Holiday Countdown Clock
The Goal
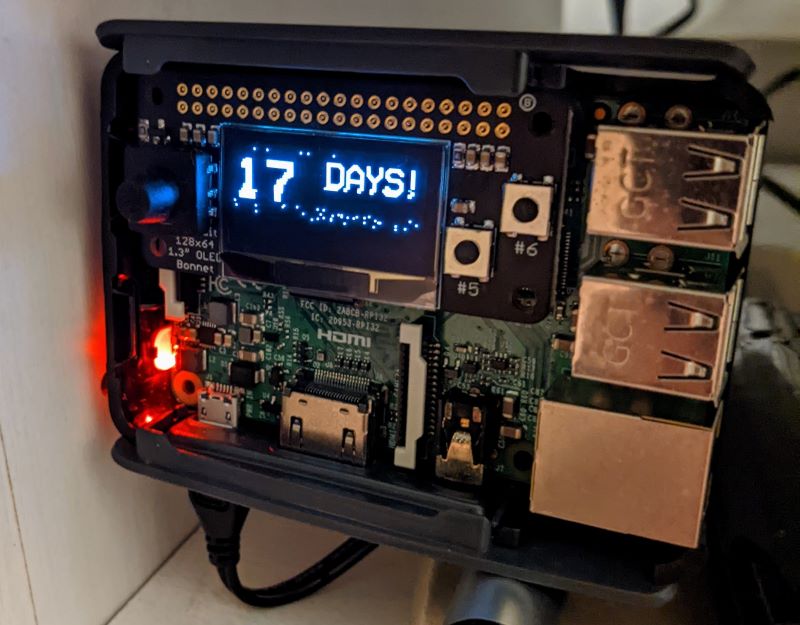
I wanted a weekend project to show a simple day countdown until I go on holiday this year, and thought that using a Raspberry Pi with a small screen to sit under the TV in the lounge for the evenings was a fun way to check on it. This was the result!
Buying The Hardware
I had a tiny 2017 Pi Zero which I thought would be an ideal mini solution. I knew that internet connectivity was essential, so I tried using the WiFi dongle I had, but it wasn’t very Linux friendly. Fortunately I had it’s bigger brother the Pi 3 spare which had built in WiFi, so I used that instead. There is now the Pi Zero W if you wanted the small form factor with built in WiFi (which I think is essential if you’re to do anything fun with a Pi).
The big purchase was the Adafruit OLED Bonnet screen for our visual output. It comes with 2 buttons and a DPad for some added interactivity which could come in handy for other projects.
If you are rocking the Pi Zero, this mini case is great (works with the bonnet on top). If you don’t have one, you’ll need a miniSD card with a USB reader, and a mini HDMI adaptor too.
Soldering Trick
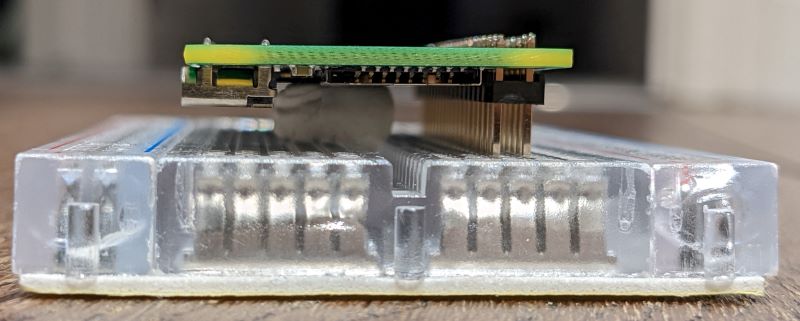
Parallel alignment of the GPIO pins to the board is essential when you’re soldering. I picked up this trick of using a breadboard to keep the pins stable (you can pick one up next to nothing), where you balance the board on a ball of white tack. From here you can solder knowing there won’t be any play on the pins. No spirit level required.
Software Setup
For the bonnet itself, there is an overview and a setup guide which tells you that after installing the Raspberry Pi OS (with desktop) with the official imager, you’ll need to install CircuitPython. The adafruit-circuitpython-ssd1306 library seems to be the only recommended library for the display. The Python Image Library (PIL) is necessary as text remains very small without it. I took the demo example .py file and adapted it to my needs. It has the initalisation code for setting up the adafruit library along with image padding etc. Below are the main things I’ve adjusted for my needs.
import datetime #Plus timedelta and time
from PIL import Image, ImageDraw, ImageFont # For font drawing
import adafruit_ssd1306 # For Adafruit's library for this to work with CircuitPython

# The delta is working out duration in DateTime to the countdown.
delta = datetime.datetime(2022, 5, 1 - datetime.datetime.now())
# Taking what we need from the delta and stringifying it for drawing
DaysLeft = str(delta.days)

# I found a true type file online which is chunky enough to work with the display
bigFont = ImageFont.truetype('/home/pi/Desktop/VCR_OSD_MONO_1_001.ttf', 36)
smallFont = ImageFont.truetype('/home/pi/Desktop/VCR_OSD_MONO_1_001.ttf', 22)

draw.text((x, top), DaysLeft, font=bigFont, fill = 255) # The left text
draw.text((x + 50, top), "Days!", font=smallFont, fill = 255) # The right static text
Datetime uses the internet to get the current delta, hence the necessity of the WiFi connectivity.
Standard Pi or Pi Zero?
After using both Pis, and after giving up on the zero’s WiFi adaptor, the standard larger Pi is easier to work with. You really feel the lack of processing power when coding on the Pi Zero and waiting on load times. Also, the lack of built in GPIO pins on the zero means you need to solder your own pins on. The standard Pi is still very small and with more ports available it makes developing on easier.